The Altar of Solitude Abyss puzzle in Crimson Desert is all about locating the floating blue squares and placing them in the correct sockets. Not only does this require the use of Axiom Force and Force Palm (about a dozen times each), but using them in the correct order. Altar of Solitude is certainly among the more confusing abyss puzzles in Crimson Desert.
If you need some help, here’s how to restore the Altar of Solitude in Crimson Desert.
How to unlock the Altar of Solitude in Crimson Desert
The Altar of Solitude is found near the end of a long string of floating abyss islands above southwest Hernand. In short, you can reach it by passing through the skybridge on the Courtyard of Precision.

If you haven’t reached the end of Chapter 4 in the main story yet, which involves the Scholastone Institute puzzle, defeating Tenebrum, and solving the Spire of the Stars puzzle, you must do so first. Then, following the Obsession and Madness quest at the Sanctorum of Insight Abyss, you can take the skybridge to the Secret Garden.
From there, using the abyss skybridges, you must pass through the Secret Garden, Vault of Vengeance, and the Courtyard of Precision to finally land Altar of Solitude.
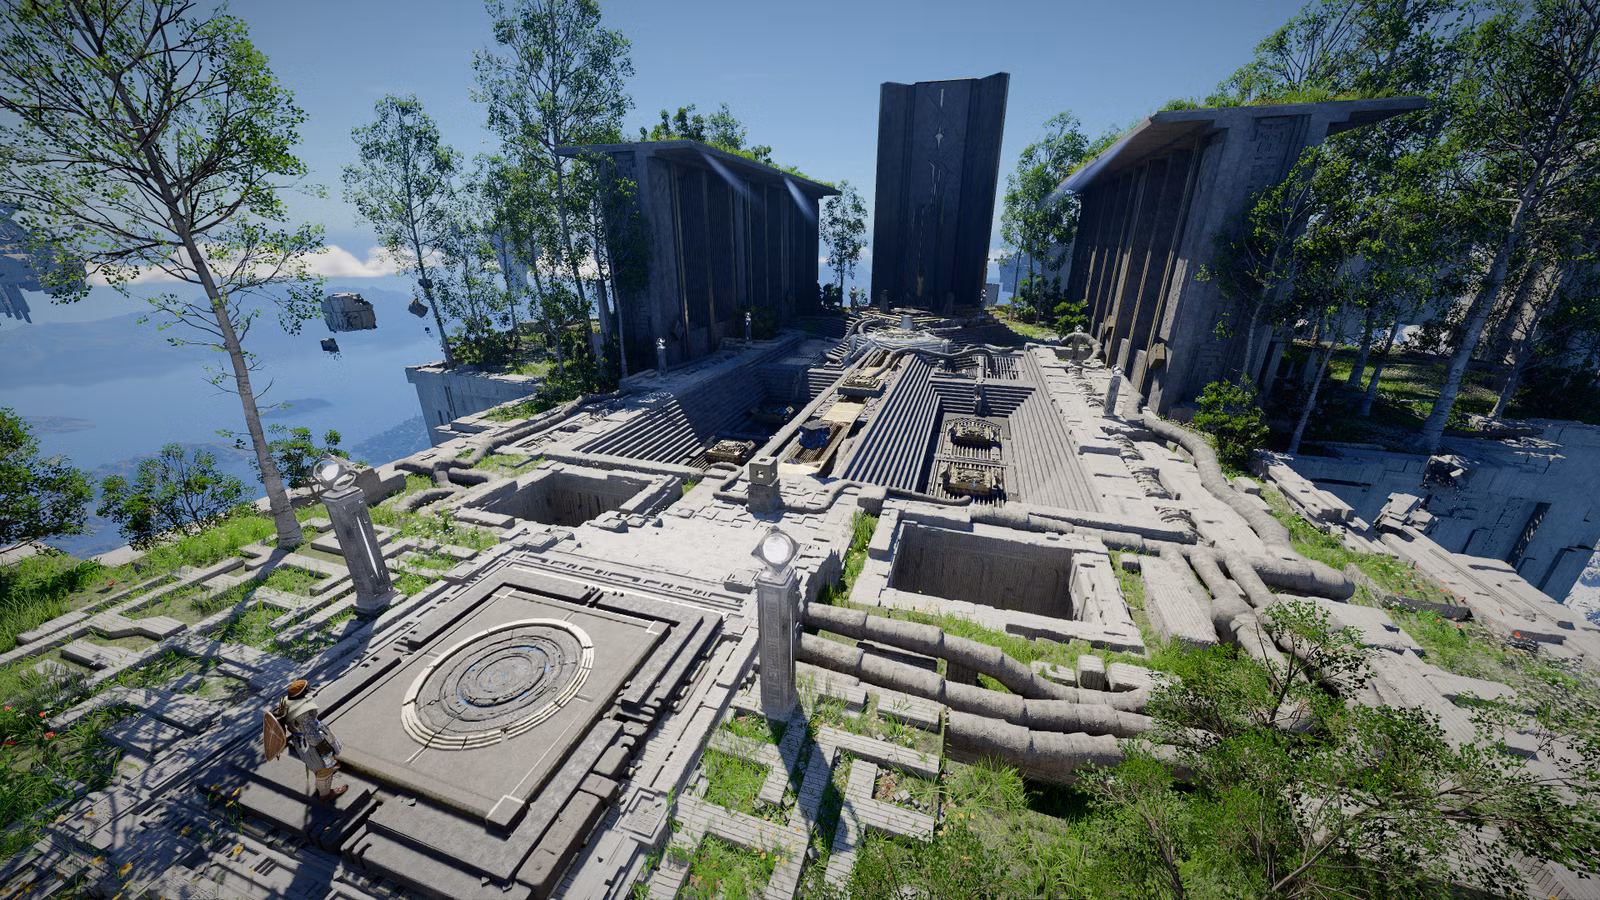
Altar of Solitude Abyss puzzle walkthrough in Crimson Desert
Directly behind the Altar of Solitude’s abyss nexus, you will find a blue cube and a blue square. Use Axiom Force to drag the cube onto the small stone pillar, then drag the blue square into the empty slot on the left.

Use Force Palm in a downward direction to fasten the blue square, which will open the floor below. Drop down, and use Axiom Force on the blue square visible through the gaps in the wall on the southwest side of the room.

Drag the blue square toward you, then lead it to the right until you see the large horizontal gap. Rotate the blue square until it fits through this gap (still using Axiom Force).
With the blue square in hand, you can fit it through the gap in the wall on your right, but a faster method is to place the blue square against the ceiling you previously fell through. It’s important to push the blue square as close to the ceiling as possible. Let go of Axiom Force, and take the circular teleporter to get back to the abyss nexus outside.
Use Axiom Force to grab the blue cube you previously placed on the stone pillar, and drag it away. As shown in the picture below, on the right side, this will rotate the ceiling of the chamber you just emerged from, thus moving the blue square (see arrow on the right) upward.

The next objective is to fill the socket in the center and both sockets on the right. You’ll need three blue squares for that.
First, grab the loose blue square you just got from the underground chamber. Drag it into one of the empty slots to the right as usual, and push it into place with downward Force Palm. Next, use Axiom Force on the two blue squares stuck in the sockets on the left. It’s a bit finicky, but pulling upward for a second or two should remove the blue squares from their sockets.
Place a blue square in the middle and into the sockets on the right, as shown in the image below.

When that’s done, drag the blue cube back to the stone pillar, and drop down alongside the rotating floor on the right (see picture below, on the left). Be quick, or the rotation will complete before you’ve dropped down into the chamber below, and you’ll have to repeat that last step.
In the underground chamber, grab the blue square and place it against the rotating ceiling, just like you did before. Leave it there, teleport back to the abyss nexus, and remove the blue cube from the stone pillar. The floor on the right will rotate, and now you have four blue squares at your disposal.

Move the loose blue square and the square in the middle socket into the two empty slots on the left. Once you’ve done that, all four sockets, which are marked with stars in the picture below, should be full.

Drag the blue cube to the stone pillar one more time, thus rotating the two floors simultaneously, and the circular pressure plate ahead will activate. Use Force Palm on this pressure plate to restore the Altar of Solitude and obtain the abyss artifact.
If you want, you can take the skybridge to the Ice Cradle next.
Just starting out in Crimson Desert? We have guides to help you learn the basics and refresh your memory on how some of its systems work. The world of Pywel is huge, so you might have a hard time deciding where to go first, but you can make your journey a little easier with the help of our interactive map. Along the way, make sure to learn a few life skills like fishing, logging, cooking, and mining, all of which can help you make money. We also have walkthroughs for puzzles in the Abyss like the Root’s End and Precipice of Truth, as well as ancient ruins like the Dragon’s Stone Chamber.